How to maintain your Vape ?
So you are one of those who keep on trying different E liquids every now and then in quest of something which makes you say This is it! I’m sticking to this! Or are you the one who is using the same flavor for quite a while but it doesn’t satisfy you the way it used to?
Flavors tend to leave traces in your tank after use, they mix up with the new ones so on and so forth, whether its the case of different flavors or the same one, traces from the previous refills tend to build up and make your taste unsatisfying.
We highly recommend you to clean your vape tanks after at least a month or so in order to maintain the everlasting vaping experience. This maintenance that we suggest is totally based on the DIY concept and takes no longer than 10 to 15 minutes.
Artisan’s Guide to Vape Tank Maintenance
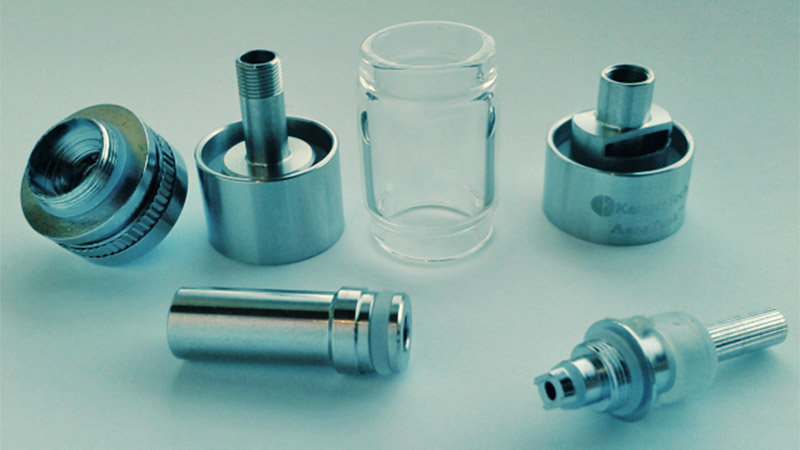
Dismantle your atomizer tank, unscrew the glass body and remove all the rubber rings. Basically, take everything apart. You might want to make a video while you are at it as it may help you out in putting all of this back together.
Grab a clean container and fill it three quarters with rubbing alcohol.
Submerge all your tank parts in the container and rinse them very carefully, leaving no E liquid residue.
Take the parts out, Rinse the container and fill it with warm water.
Dip the parts back in the container and let them sit in for a while.
After soaking the parts, rub them very gently with a piece of cloth or a toothbrush preferably, making sure there is no residue of either the rubbing alcohol or the E liquids.
Dry the parts on a paper towel or with a blow dryer and re assemble them together.
Tip: Use E liquid as a lubricant for the rubber rings and coil screws.
We also recommend for you to install a new coil after this maintenance so your vape is as good as new.
Fill it up with your favorite E liquid and enjoy your vape session the way you used to!

